For Guitarists & Lifelong Lovers Of Music Looking To Finally Crack The “Jazz” Code:
How To Make Jazz Guitar
A Walk In The Park
An Extensive NO B.S. Guide To Improvising And Comping On The Guitar Convincingly
…without getting overwhelmed in the process
Preface
The typical jazz "teaching system" is still insisting that we "learn all scales, all arpeggios, all positions, and all keys” before playing tunes. But are all these prerequisites really necessary to become a confident jazzer? (hint: not really…)
Just like baking a delicious cake, learning and playing jazz requires a recipe for success. Instead of focusing solely on the ingredients (scales, arpeggios, string gauges, pedals), you need a plan to mix them up into a secret recipe that you can execute daily.
Let’s find out the exact recipe I use with my best jazz guitar students…
Author: Marc-Andre Seguin
References
Before we start this presentation, I just want to show you a bunch of proof so you can be sure that this system actually works.
The graph below showcases the subjective (self-reported) mark of my students’ progress in 2022.
The average student 4x their skills within 90 days [Click Here].
Here are some examples of me playing:
The Frank Waltz: (I'm on the left with the blue guitar)
Here is a video of one of my student Miles Barel. He started working with me about 8 months before shooting this video:
Here is the compilation of some cool student testimonials:
And you can check hundreds of student reviews here:
https://www.jazzguitarlessons.net/reviews
Intro
This presentation aims to show you a step-by-step roadmap on how to make playing jazz guitar a walk in the park, and how to finally make improvising and comping second nature to you.
If you read and implement everything here to a T, I promise you, you’ll achieve this.
You’ll have confidence and ability to show up at jazz jam sessions and play extremely well…
You’ll not be ever intimidated by someone asking “Hey, play me a song!”...
You’ll always know that you are practicing the right things…
And you’ll have a lot of fun in the process.
Now…
For my sake, your sake, and your jazz guitar’s sake, don’t treat this as just another “guide”.
Use it. ABUSE IT.
It took me three weeks just to assemble this guide, and I spent years trying to develop the process that I’m going to cover…
So…
DO NOT SKIM THROUGH THIS. IT’S DANGEROUS.
If you don’t have 20 minutes now… FINE!
Get back to it when you have.
Bookmark it in your browser.
And block the time in your calendar to study it.
If you want a PDF copy so you can print it as a handbook, you’ll find my contact details at the end of this page, so you can shoot me a message there.
If you find it useful, please share it with your friends.
My goal is to change the way jazz guitar is being taught.
I recommend you to read this guide once from start to finish carefully to understand the big picture, and then get back to action items every day and follow the steps in order.
Let’s go.
Who is this for?
This is for you if you’re a guitarist and a lifelong lover of music but you are either not playing jazz at all or you still don’t have the ability to play a song A-Z with all elements.
You’re maybe thinking of yourself as an in-betweener. (not beginner anymore, not yet intermediate)
You’re currently NOT improvising and accompanying well, even though you may “know” lots of the chords and vocabulary for playing the tunes.
You’re probably trying to emulate how you learned other styles with jazz… (hint: it doesn’t work…)
You’re trying to find shortcuts…
Or you maybe don’t even know where to start with jazz…
You tried and failed many times, with many different approaches…
Either way, your priority here is to play jazz on the guitar convincingly, but you just didn’t find a proven, step-by-step process to make it happen.
The Problem:
I’ll be completely honest, learning jazz properly is effing hard.
Excuse my language…But that’s a fact.
It takes years. Dedication. Practice (smart practice), good habits.
A good teacher.
… And a bit of luck.
It takes 10 years to become an overnight success in jazz.
And the “masters'' themselves are typically bad at putting into words what they do.
There’s no real, unified jazz pedagogy out there
One of the reasons it’s THAT hard is because it’s like learning another language.
NOT the case while learning rock, blues, folk, or bluegrass music…
Jazz is like the chess of music.
There’s no comparison.
It recruits the entire nervous system.
It’s a legacy started in America in the early 20th century …
And it’s more than a “style” of music…
It’s actually a way of approaching things and playing music.
Jazz is its own art form.
Now, it may be hard for you to grasp this.
Especially if you spent 20+ years playing funk, rock, blues, or metal with a certain level of success and without too much effort…
And it’s not just improvisation or soloing that is difficult to master.
It’s the entire vocabulary of jazz.
But the truth is that it’s possible to create a positive feedback loop with solid habits…
And make a significant improvement, really quickly…
But only if you’re following the right system…
Now, you may have been endlessly watching YouTube videos looking for the next “holy grail” that will make everything “click” for your jazz sound…
Or purchased transcriptions, scores, sheet music…
Or even bought books, courses, and memberships on the topic…
But, let me guess…
No improvements…
At the end of the day, with all of that information…
You’re just being overwhelmed…
And not making progress at all.
That’s a really big problem in the “guitar education” space nowadays.
Because of that, you may fear that you will never be able to play jazz correctly…
Or you may think that you are just not born for this…
But I’m here to deny that.
The thing is…
You probably have all the right ingredients…
Scales, chords, tunes, technique, etc.
(Or even if you don’t have them yet, it’ll be easy for you to get them.)
But the real problem is that you don’t have the right recipe to put this all together.
$10 per month memberships suck. So do goodies on Patreon.
And almost all YouTube videos, and courses on the topic.
Why?
Because it’s just the information…
You probably don't know how to order and incorporate all of these things into your guitar playing in a way that makes changes that last…
Because if you knew…
You would probably be a jazz master by now…
And you wouldn’t be reading this presentation…
Now, here is the truth.
The Truth:
The truth is that you can learn how to play jazz guitar confidently and convincingly without getting overwhelmed in the process…
And without needing to “learn it all” in terms of technique and theory before playing.
Believe it or not, learning jazz is hard, but it isn’t any harder than learning rock, blues, or pop on the guitar…
It just requires a different and smarter approach.
However, most of you don’t have the step-by-step, NO B.S. system to follow since no one is talking about this…
I decided to get my hands dirty and create a proven path for you…
So, what’s the right system?
The process that worked for me, works for my students, and produces incredible results is akin to “divide and conquer” – we establish the work we have to do on a single tune, and then rehearse and execute. It’s actually pretty simple.
“Step Zero” is: Select the tune or chord progression to work on. Or pick from suggestions.
- Staples: play one basic voicing per chord symbol, out of time
- Conveyor: Play staples in solid, repetitive rhythms over the form (key jazz rhythms)
- Chord Melody: play a complete CM, as a solo arrangement of the tune
- Make the Changes: perform 1, 2, or 3-note resolution to a target note, on each chord
- Jam: Perform 5a naked melody, 5b basic comping, and 5c basic soloing using any/all materials from previous steps – should feel like a genuine jam session experience
- Shells: Perform Step 2 with the bass note removed (Shells+1) and with the added top string (Shells+2) … create melodic movements on top strings at will
- Workout: Perform the following four drills and improvise last … (adjust drill difficulty to the current level of understanding and proficiency).
- Guide-tones
- Scales
- Arpeggios
- Resolutions
- IMPROVISE
Build your repertoire: rinse and repeat one more song … and keep reviewing the process on known songs. Refine and adjust the challenge level of each step accordingly.
I used this system to teach myself and all my successful students, and the process is 100% repeatable.
Here are the steps in a little bit more detail…
B.T.W if you don’t already know who I am…
My name is Marc-Andre Seguin and I’m the founder of JazzGuitarLessons.net. 👋
I started playing piano at around age 8 and took up the guitar when I was 12.
I played it all through high school and joined bands with other kids my age.
At that time, we played a lot of heavy rock, metal, and even some progressive music.
I was learning the ropes of guitar chords, riffing, amps, pedals, and how to take a “good lead guitar solo” from idols like Steve Vai, Eric Johnson, Metallica, Megadeth, Hendrix, Van Halen, BB King and the likes.
After a quick detour in computer science (3 semesters in University), I took up serious music studies and got a B.A. in classical music studies in Ottawa.
At that time, I kept playing rock, blues, and metal music as well.
And I started to make local contacts in the jazz world.
This is when I played small gigs with singers, and jazz saxophonists and at jam sessions.
I got REALLY hooked. I kept listening, playing, and learning.
Jazz became all-consuming.
Around age 21, I moved to Montreal to start another undergrad degree, this time in jazz studies.
The experience was tremendous.
I started to connect with more experienced musicians and legendary teachers…
I began to have a firmer hold on what jazz was about … and the amount of time and dedication it would take to get me “there”.
I kept practicing, going out to jam sessions, hearing live music, taking lessons with amazing mentors, and completing my university studies.
I made lots of great connections in the city.
And then…school was over …
For a few years as a struggling artist, barista, and part-time waiter, I was broke and actually very poor at times.
I could teach private lessons, but recruitment was slow, and competition was ferocious.
But I kept on practicing and learning more and more about the music.
I played in ensembles from duos all the way to 30+ musician big bands.
I played rock in larger venues as a “hired gun”.
I also played weddings, cocktails, graduation ceremonies, BBQ “back porch” parties, birthdays, coffee shops…
I even played in the subway system, and on street corners for spare change.
Then after some time, things finally clicked for me…
Since 2009, I have gone from a broke musician to a world-leading jazz instructor.
In that time, JazzGuitarLessons.net has helped visitors from all walks of life all over the world to achieve their jazz guitar goals.
My mission right now is to make jazz accessible, reform education, and finally end the madness in this space. (tons of information, yet starving for knowledge)
I’m currently serving 59 premium students, and over 6,254,491 people watched my lessons on YouTube and other channels…
My YouTube: https://www.youtube.com/c/jazzguitarlessonsnet
I promise that I won’t hold anything back in this presentation.
My goal with this is to get you EVERYTHING you need to achieve what I said in the title.
Let’s go.
Step-By-Step Process
Start here: Pick a tune or chord progression
This one's a no-brainer. The sooner you decide, the better. It'll give your jazz journey a good push.
Grab a reliable lead sheet that shows you the melody and chord symbols, even if reading sheet music isn't your strong suit.
And if some of those chords seem like a foreign language, don't worry. We'll simplify things to four chord groups in the next step.
For beginners and those in the groove:
- Autumn Leaves (Gm or Em)
- Blues (in C, Bb, or F)
- Rhythm Changes (Bb)
- All the Things You Are (Ab)
- Stella by Starlight (Bb)
- Stick with the classic I VI II V progression
- Or mix it up with a snappy II V I VI (with the sixth chord as a dominant 7th)
Feel free to grab a favorite from a fake book like The Real Book.
Be practical when choosing your tune. Commit to one (no more, no less) for the next 6 or 7 steps.
While the siren call of challenging jazz tunes like Giant Steps or Donna Lee might be tempting, let's take it one step at a time.
Start with a tune that's approachable, hold your ground, and let's kick off Step 1.
Step 1: Staple Voicings
Alright, first things first. Let's focus on getting one solid, sweet-sounding jazz chord voicing down for each chord in your lead sheet. We're taking it easy for now, no need to rush.
We're breaking down chords into four main groups:
- Major
- Minor
- Dominant (the ones with numbers)
- Others (like m7b5, diminished, you know the ones)
Look at your lead sheet and slot each chord into one of these groups.
Don't stress about all the fancy extensions for now, just think up to the 7th.
You can jot this down on your chart like this:
Next, give one of these Staples Voicings a shot. I call 'em Staples because they've got roots on the 6th or 5th string and guide tones on the middle string set. Here's a cheat sheet of go-to Staples to be used with my students.
Notice, on the cheat sheet, every chord has just two possible spots on the fretboard: "high" or "low," depending on if the root hangs out on the 6th or 5th string.
Example: Cm7 could be 8x888x or Cm9 might be x3133x. Getting cozy with the root view on those bottom strings is a game-changer.
This step takes those hefty progressions with tons of chords and streamlines it to ONE option for each symbol.
And each one is practical, easy on the fingers, sounds sweet, and will pop up again in the steps to come as we dive deeper into jazz standards. Check out how these Staples work their magic on Stella by Starlight for some practice.
If you'd prefer, you can watch and listen to a video rundown on Step 1 right here.
A few traps to sidestep:
- Trying to cram your brain with endless chord inversions, extensions, and finger gymnastics to be "extra prepared" for comping on songs.
- Skipping the precision to hit each chord in just one voicing with a nice sound.
- Diving too deep into the theory of why chords move the way they do in the song instead of just playing them.
- Getting hyper-specific with chords (like dom13(b9)) and missing the bigger picture.
Let me make this clear: if you want to succeed in this journey …
- look at a chord symbol,
- figure out its family,
- pick a voicing,
- and play it!
Anything else is just noise. If you're thinking, "This is too basic for me," film yourself going through Step 1.
Take a peek. Chances are, the Staples still need some love. Adjust. Try again.
Now, let's get real about something: this ain't a walk in the park (just yet).
I'm not here to sugarcoat it.
But trust me, if you work through this process, it works. That's a big "if."
You don't need to become a chord encyclopedia in every key and practice them separately from a song.
That's just another distraction! Make sure everything you learn is within the context of a tune.
Otherwise, you'll fall into the trap of collecting "prerequisites" for playing jazz. You don't need all that.
Just start with the tunes. [Shaking my head] It's a sad state of affairs, but I know plenty of folks who spend years drilling licks, chords, scales, arpeggios, and techniques and can't even jam on a tune. Years! Stick to the process, thank me later 😉
Another mega-important thing: how you hold your guitar while playing these Staples over standards.
About 80% of my new students need to tweak their posture within the first 3 weeks.
It's normal, especially since a lot of these chord shapes are fresh. There's a ton of new info and finger positions.
So keep things relaxed and open (body and mind). The best way to dodge bad posture and tension is to have a seasoned pro check your form.
For now, you can watch some tips on posture for jazz guitar right here.
If you feel any pain, stop playing and adjust. Something's off. A bit of discomfort and pushing your limits is alright, though.
Step 2: Conveyor Belt
Alright, now we're adding the groove and timing. We'll kick off with basic jazz rhythms, still using the chord voicings you nailed down in Step 1.
We're keeping it fairly straightforward, but stepping up the challenge a bit.
Here's what you'll need:
- A good grasp of beats (the pulse) and a sense of time passing.
- Awareness of the form, which I like to call the "Conveyor Belt."
Over 95% of jazz tunes rely on a steady beat, a.k.a. pulse or tempo, usually played over a structured number of measures. Whether you're comping, improvising, or playing chord melody, it all hinges on keeping in sync with the form and the pulse of the song. Falling short here might land you in the "bedroom player" category, struggling to groove with a backing track, let alone jam with others.
Reality check: one of the most common beginner slip-ups is losing track of the chord progression's context.
It happens, like adding or skipping a beat by mistake, or speeding up or missing a repeat.
I'm a full-time jazz guitar coach, and even now, over 50% of my daily feedback (given directly to students) revolves around timing.
So, folks, fix your timing! Count out loud! Commit to it!
To put Step 2 to work, we're taking what you learned in Step 1, adding timing (yes, counting 1-2-3-4), and throwing in a basic, repeating rhythmic pattern.
Check out this cheat sheet of Four Key Jazz Rhythms PDF that I recommend to students when they start this process.
If in doubt, go for a straightforward four-on-the-floor, hitting a chord stab every beat in a 4/4 bar. Make sure it's slow enough for each attack and note to ring out.
Also, ensure that:
- You can smoothly follow along with the form while audibly counting (not just in your head).
- You always know which chord is up next.
- You recognize when the "Conveyor Belt" loops back to the beginning.
- Your chord transitions flow seamlessly between each Staples. No fudging the time. No pausing and rewinding. Just play through!
Your goal in this step is to maintain solid timing through a few repetitions of that form while comping the nice chords.
It's easier said than done, I know!
Feeling a bit lost in the song structure? Slow down, or focus on a small chunk of the form until you nail those chord transitions in time.
If that still doesn't click, temporarily drop the timing and work on those tricky fingering transitions “out of time” (like in Step 1).
Remember, posture and hand position matter. We don't want to "lose a beat" because fingers are lagging.
For context, check out the "Conveyor Belt" comping demo and etude for Stella by Starlight.
I'm using both the Charleston rhythm and a straightforward four-on-the-floor. And I’m doing so in the video with the Staples I picked in the first step.
Note that Stella is quite an extended form, and I'm only going through it once in the etude above.
In actual jam sessions or performances, we'd loop that whole 32-bar form several times for solos and such.
It's vital to "get back to the top" of the song at the end, respecting this idea of the "conveyor belt" – it keeps rolling until the musicians decide to wrap it up.
And a final reminder from Step 1: diving into more complex jazz harmony won't do much if you can't play the basic voicings in straightforward rhythms.
Instructors might tell you otherwise, but trust me on this. Progress in jazz comping often comes from tackling fewer voicings, not more.
To emphasize once more: you'll inevitably hit snags. You'll stop counting. You'll pause. Or you might try to backtrack and fix errors.
It's all good. What matters is recognizing when timing slips. Then, pick yourself up. Fall down 99 times, get back up 100 times. And then, get back in the saddle!
So, in a nutshell: count, keep counting, stay mindful of the form (that "conveyor belt"), keep hitting those chords in time, with a solid sound.
And thank me later for insisting on building that foundation: we've only just begun our journey.
Step 3: Chord Melody
Alright, in this step, we're crafting a "complete yet not overly complex" chord melody arrangement of your chosen tune.
Keep these three elements at the forefront:
- The melody should ring out clearly and feel singable, as if we could croon along.
- There's a fundamental chord accompaniment harmonizing with the melody.
- The entire arrangement flows seamlessly in time, keeping a steady tempo.
In a nutshell, you're delivering a solo version of the song.
The focus is on letting the melody shine, staying in time, and adding just enough chords to capture the essence of the piece.
Some guitarists call this a "thin" chord melody, as opposed to a densely layered chordal etude in classical music. We're aiming for clarity, not complexity!
Imagine a stripped-down piano rendition: melody (right hand) paired with basic chords (left hand). Translate that to the guitar.
We'll use the high-pitched strings for the melody and the lower registers (bass + chords) for comping. Simultaneously, of course.
Here's our guiding principle:
- the melody (soprano) typically resides on the top two strings,
- while chord accompaniments feature bass notes on the 5th or 6th string (remember those Staples?) and guide-tones in the middle register.
- No need to overload with extra chords. The focus remains on the melody, always.
Think of it as saying, "Play me a song," and we want it to sound "okay," with the listener recognizing the melody.
All the techniques, chords, arpeggios, and theory are worth nothing if we can't simply play a memorable song!
Make sure you can perform this in good time.
It's okay to rehearse passages without a steady tempo (especially to work on tricky fingerings), but the end result must groove in time, with the melody flowing throughout, akin to a singer serenading it lyrically. (We're not just cycling through chord shapes here!)
There are numerous ways to approach this in a tune. As an illustration, here's a swift demonstration for Stella by Starlight, a fully arranged, minimalist chord melody.
Let's not overcomplicate things. Not on the theory side, nor in executing those chords!
Newcomers to jazz sometimes fall into the trap of crafting intricate, convoluted studies of jazz harmony in their chord melodies.
They might try to shoehorn in "every chord they know" each time, and that's an issue.
Or, they may turn chord melody into a game of "each melody note requires a chord beneath" – this just leads to paralysis by over-analysis.
Remember, the ultimate goal is to play the song.
If you're playing a chord melody and we can't recognize the tune, it's not a chord melody. It's just "playing a series of chords in succession."
To give you a little jolt, envision I'm personally walking into the room while you're performing your chord melody arrangement.
Would I recognize the song? Could I sit down with you and start soloing or comping during your arrangement? If not, it needs more practice and a more solid foundation.
Another common pitfall is falling for the myth of prerequisites in jazz: "I'll master all the fingerings and chords first, and then tackle timing and rhythms later.
" Don't buy into it. Start slow. Play with solid rhythms. Keep counting. Work on small challenging chunks. Ensure the melody is crystal clear.
Record or film yourself. Watch to gain insights. The time you invest in working on chord melody for the same tune over a while pays off enormously.
If you prefer to watch it, here’s a brief video explaining the third step here.
Step 4: Make the Changes
Now, let's dive into fully outlining those chord changes with a straightforward single-note solo on our chosen tune.
And we'll do this with precision, by zeroing in on our target notes picked from the Staple Voicings in Step 1.
We're going to move through the entire song, keeping our focus on the 3rd degree.
This boils down to practicing single-note etudes and drills that approach and “resolve” into the 3rd degree, for every chord on the chart of the song's progression.
You will eventually work on 1, 2, and 3-note approaches on the fly.
This lays a solid foundation for improvisational lines in the upcoming steps. Keeping the 3rd-degree front and center in your mind then becomes key.
The main focus here is two-fold:
- Executing this in perfect time, at tempo (I bet you saw that one coming!), and
- Maintaining a clear awareness of the intended "aim" in each line (cognition).
Many guitarists learning to improvise jazz get bogged down in a multitude of systems, tricks, scales, and arpeggios in an attempt to emphasize the chord changes. (Hint: most systems don’t actually serve the intended purpose).
Here, we streamline everything, honing in on the most inevitable resolutions: “landing” on the 3rd, fundamental in all cadences since JS Bach.
Essentially, we start by concentrating on those "money notes," and we'll gradually build vocabulary around them in the next phases.
In other words: you don’t need to memorize the entire scales or arpeggios to start making music, including some pleasing, basic improv lines. The best part: the 3rd degree of each chord family is already present in your Staples Voicings 😉
As a general approach …
- Place the 3rd degree of the chord on beat 1 of the bar, as the target
- Remember to play only single-note lines (not chords)
- Place the targets primarily on the D and G strings (middle of the guitar).
- Once that's established, maintain the target on beat 1 and “walk back” with a few approach notes in the bar before the target.
- Play it. Be amazed.
Of course, this must be executed in solid time at a good tempo for it to work well in context.
There are numerous ways to achieve success with aiming at target notes and resolving, and initially, we're favoring the descending scale as our approach.
For instance, consider a C major chord; three approaches could be a descending scale like A G F | E (where E is the 3rd degree of the C major chord).
Notice how E happens right after the barline, on beat one. There are lots of possible approach notes; later, chromaticism and resolving arpeggios can be incorporated.
Confused? Ok, let’s simplify this.
Since there are several methods to develop the skill of "aiming" and then fully resolving to a target note (which you'll no doubt explore further), it's highly recommended to start with just the 3rd degree.
Yep, that’s right! So this means counting up three letter names.
For instance, C major chord, I count “C, D, E” and E is my target note.
If you’re curious how far this can take your playing, let me tell you this technique leads you to all kinds of beautiful places.
Here's a demo of "making the changes" on Stella by Starlight, utilizing different techniques to reach varied target notes.
If this seems a bit daunting initially, here's a more methodical study on 1, 2, and 3-note approaches to simply "make the changes" to the 3rds on a basic II-V-I-VI progression.
And now for the pitfalls. You have probably already tried to either
- apply scales directly like a “plug and play” game on a song or
- reduce an entire chord progression to ONE set of notes or scale (like in blues and rock),
Stick with me here, and you'll eventually come to accept that it's not the way to construct jazz solos.
Generally, newcomers to jazz miss out on those crucial resolutions at the point of chord change, the moments that give all great jazz improvisation that satisfying "ahhhh...." (release of tension).
You know my general advice is still to not make things more complicated than they are.
But the opposite also holds true: if you’re trying to generalize your entire jazz solo to a single scale or arpeggio, you will fail miserably.
That’s over-simplifying. In jazz improv, we must address each chord as it comes in the progression.
And target it. Now *is* the time to look at each tree individually and not the entire forest.
Another bad habit you might have already developed: waiting until the chord happens to start using scale/arpeggios related to it.
That’s actually quite incorrect. When the chord happens, it’s too late to start thinking about resolving to a target note!
With my process, we're setting up the next chord as our aim, and incorporating approach notes beforehand.
An apt analogy is reading a text aloud... while my mouth articulates certain words, my eyes are already scanning ahead to the next words on the page. Right?
Once more for emphasis: don't complicate this more than necessary.
Keep counting. Avoid excessive analysis (instead, play!) And make sure you are recording your practice sessions; it will offer valuable insights.
Yes, I'm reiterating, but these are the most common stumbling blocks.
If it were easy, everyone would be an amazing jazz player. And I'd be out of a job as a jazz instructor.
Here’s a video where I walk through the basic steps for making the changes.
Step 5: Jam Session
Now, let's immerse ourselves in the multifaceted world of a jazz guitarist within the context of a jam session.
This step involves performing three key roles: playing "the head" (the theme or naked melody), providing comping (similar to what you'd do behind another soloist), and improvising a basic single-note solo.
These roles are the core of this step.
This experience aims to simulate a real-life jam session, all while you remain comfortably in your practice room.
You'll seamlessly transition between these roles without breaks or overthinking. This prepares you for live jam sessions or playing with fellow musicians.
Here's a breakdown of the sub-steps:
- Step 5A: Play the "naked" melody, which is a continuation of what you practiced in Step 3. This time, focus solely on performing the melody without any chords, on top strings.
- Step 5B: Provide a basic accompaniment, drawing from the skills you honed in Step 2. Feel free to ad lib with the chords as needed.
- Step 5C: Embark on a concise improvised solo, directly inspired by the work you did in "Making the Changes" during the previous step.
This jam session encapsulates a synthesis of all the previous concepts you've learned. It's akin to "sitting in" at a jazz jam, as jazz musicians would put it.
You can execute this with backing track software, a live band, a recorded track, a looper pedal, or even a metronome.
The crucial element is to replicate the genuine jam session experience — no pauses, and everything played in solid time. Simply "sit in"!
Let me emphasize once more: one of the main challenges here is maintaining impeccable timing, rhythm, and adhering to the form and tempo.
The solution is simple but crucial: Count. Keep counting, and do it out loud. Refer back to Step 2 to maintain your place in the Conveyor Belt. If you get lost, don't fret; just start over.
To illustrate, here's a jam demo over "Stella by Starlight," performed using the software iReal Pro. In the video, I play the head, the comping, the solo, and then return to the head. Is it simple? Yes. Is it easy? Not necessarily.
The advantage of practicing this in a controlled environment (your practice room) is that the backing track software doesn't mind starting and stopping as many times as needed.
However, actual musicians may grow impatient with interruptions. Regardless, discipline yourself not to stop unless absolutely necessary—it's part of the training.
Chances are, you've never played a song from start to finish without interruption. This step is a game-changer. Many bedroom players can play snippets, licks, and riffs from various songs but seldom create a finished product. Think about it like this: Finished, Not Perfect.
Another common mistake is not staying in the same role long enough to make real progress.
For instance, professional guitar players can provide comping for 5-15 minutes continuously during extended horn solos (been there, done that).
Takes a lot of grit to comp on that 23rd chorus on Cherokee at 1:15am in a dusty pub 😅
The mantra here: Keep it simple. Embrace the three different roles of a jazz guitarist.
Be patient. Count diligently. Maintain your place.
Record yourself for insights. It's much more manageable to excel in individual roles like this than trying to master everything in a single go.
Even after over 20 years of teaching, I'm still amazed at how intermediate to advanced players can struggle with this step.
The easiest solution is to divide and conquer, and you'll be astonished by the results.
Oh … and once again: no, you don’t need to learn any/all of this in different positions, fingerings and keys.
Play the jam with chords in one location, with the melody roughly on the top strings, and with your single-note solo in the same place.
Don’t overcomplicate things and get lost in a sea of theoretical or technical information. In spite of what other instructors will tell you.
Simplicity makes you play better. Overload makes our brains freeze and stop.
For a comprehensive walkthrough of how to navigate Step 5 in this process, check out this video explainer.
Step 6: Shell Voicings
In this step, we're introducing a bit more flavor into our chords and comping.
We'll be using tastier, more colorful jazz chords that don't necessarily have to include a bass note.
Additionally, we'll be moving the top notes around for added melodic interest. This will enhance both your comping and chord melody playing.
Begin by replicating the techniques from Step 2, but this time, leave out the bass note.
Remember, tempo is non-negotiable. As you grow more comfortable with the tune and progression, you might even find yourself adding more rhythmic variations.
The idea here is to expand your harmonic palette by building on what you've already learned. Seasoned jazz guitarists often rely on just 4-note (or sometimes 3-note) chords that, within the context of the music, beautifully capture the current harmonic richness.
Beginners can quickly grasp this concept by simplifying Staples Voicings.
That's why we're starting with the Staples, removing the bass note, and leaving us with 3 notes on the D, G, and B strings.
This gives us some basic movement on the B string for extensions or alterations.
We call this Shells+1.
Keep in mind that this creates two versions of each chord, one high and one low.
Both versions maintain the guide tones on the D and G string, which is desirable for consistent fretboard navigation throughout the process. Finally, replicate the process by adding the E string into what we call Shells+2, giving us even more melodic possibilities on each chord.
Here's the overview of this step:
- Perform three-note "rootless" voicings, which involve removing the root from all Staples in Step 1. This results in what we call Shells+1. For example, G13 becomes xx345x.
- Add the top (E) string to that voicing (referred to as Shells+2), giving us a four-note voicing. For instance, a G13 staple can become xx3455, or even a G13(b9) like xx3454 as a Shell+2.
- Remember, everything should be played in solid time, maintaining a good tempo, with nice rhythms and feel 😉
One of the major challenges with shell voicings is dealing with partial barre chords using the 2nd and 3rd fingers.
Focus on small movements and resolutions. Slow, steady practice is key here. Some tendons and ligaments do take a while to stretch, but trust me: they do stretch over time.
Actions often speak louder than words, so here's an example of using Shells+1 and +2 over the Stella by Starlight etude.
While there are various ways to approach this, the provided etude may serve as inspiration as you work through this step with the song you've chosen.
As a side note, please avoid:
- Learning all inversions.
- Doing it all on paper and adding the 9th to each inversion.
- Attempting to memorize all chords, in all keys, with all extensions.
This can turn into more of a fretboard exploration exercise rather than genuinely learning effective comping in the jazz style.
Let me be straightforward: no amount of dissecting these voicings on paper and in theory will make you a better player. Pick up your guitar, plug it in, and just play.
So, learn the Staples, remove the bass note, and figure out your Shells+1 and +2. That's all there is to it!
Oh, and by the way, it's perfectly fine to revisit Step 5 now and incorporate these new shell voicings into your jam session. Most students will naturally do this without a specific assignment.
For a quick video explanation on building shell voicings from our staples, check out this video.
Step 7: Improv Workout
In this final step, we refine our improvisation skills through four specific drills designed to enhance our ability to navigate chord changes. These drills serve as a springboard for creating more intricate and expressive jazz solos. The ultimate aim is to build a robust jazz vocabulary.
After thoroughly covering Steps 1-6, we're now poised to expand our improvisational toolkit.
It's crucial to practice within the context of a song, allowing us to develop specific skills like employing scales and arpeggios at precise moments in the song's structure.
This is what we refer to as "building ammo," and it significantly bolsters our improvisational prowess.
Here's how to execute this step effectively:
- Guide-tones: Focus on the D and G strings (see Steps 1, 4, and 6).
- Scales: Begin with a basic 1 → 7 pattern (e.g., C D E F G A B).
- Arpeggios: Emphasize the 1 3 5 7 pattern (e.g., C E G B).
- Resolutions: Leverage concepts from Step 4 or create more complex resolutions.
- Once you've completed these drills seamlessly, transition into improvisation.
It's crucial to tailor these drills to your skill level, aiming for a state of flow—not too easy, but not overly challenging either.
Flexibility is key, and there's always room for progression. The ultimate goal is to enrich your jazz vocabulary with dynamic lines.
Upon completing this step, you'll have a clear understanding of your strengths and areas that require improvement. This insight guides your practice for continued growth.
For a clearer demonstration, watch the Improv Workout over Stella by Starlight. Remember, this is just a baseline to guide your own workout.
A vital point to remember is to always practice in context. Avoid the trap of learning isolated skills before attempting improvisation.
As a jazz improviser, you'll predominantly solo within the structure of a song. Therefore, it's imperative to simulate this in practice.
To reiterate:
- Play the four drills, on the form, in a good tempo, at a challenge level appropriate for you right now.
- Improvise for the last and fifth sections.
- Use whatever insights you receive from the workout to fuel your next practice sessions!
That’s it! You can use a backing track, metronome, or looper pedal to go through the workout.
It's possible you've tried various methods to build a jazz improv vocabulary, such as playing along with a backing track.
While repetition is beneficial, it may not be enough. Some may turn to transcriptions or lick-learning without investing the necessary time in mastering the foundational elements of jazz melody and harmony over chord progressions.
The provided workout above offers a structured approach that has proven effective for many aspiring jazz musicians over the years.
Give it a try, and you'll notice the difference.
“Step 8” RINSE and REPEAT for infinite skills
Choose a new song and dive back into the process. You'll notice your skills strengthening and your understanding of voicings and rhythms becoming more solid.
Progress will become evident.
Symbolically, if I take the figure “8” and lay it flat horizontally, I get the infinity sign. ♾️
Remember to revisit previous tunes and refine each step. It's normal to forget some of the earlier material, so don't worry. The next round will help solidify your knowledge and playing abilities.
Where to next? Stick to the "divide and conquer" approach.
Focus intently on one aspect at a time, receive feedback, and get good at it. As always, count the beats and bars, keep your place, and film yourself playing.
Review your videos objectively or ask for feedback.
It's not rocket science!
As you tackle more materials and songs, be mindful not to overload your practice session with too many different topics. Document your practice routine for better organization.
If you're feeling stuck, consider these possibilities:
A - Ensure you're fully focused on the task at hand.
B - Don't rush. Master the material before moving on.
C - Play more and analyze less.
D - Avoid trying to pursue too many things simultaneously.
In a nutshell: Go deep, not wide. Focus on one thing, give it your best, and repeat. Progress will follow suit. Keep up the good work!
NEXT STEPS
So what now?
You have 3 options moving forward…
Option 1:
You can pretend that you never saw this and continue doing what you are doing right now.
You can continue learning jazz the “wrong” way…
And still be intimidated by someone asking you to play a song…
And still not being able to “hold your own” at a jazz jam session…
I won’t recommend you pick this option.
You will regret it.
Option 2:
You can follow the exact process I laid out for you in this presentation.
If you follow it to a T you’ll inevitably see success but it will probably still take you much longer to do so.
Also, the chances are that you will get distracted and procrastinate on the system.
You will need to find someone to review your video submissions, someone to hold you accountable, a coach to tell you what to improve upon, etc.
And there are obviously still variables that I couldn’t cover here and there are still unique things for your situation that you’ll have to figure out by yourself.
Or…
Option 3:
You can work directly with me.
Implement this system from day 1 without mistakes or procrastination.
And ultimately 4X your jazz guitar playing. GUARANTEED
Yes, I actually guarantee (in writing) that I will 4X your jazz guitar skills in only 12 months (self-reported progress)...
And if you don’t 4X your jazz guitar skills in those 12 months, I will work for FREE with you, until you do.
This is the offer that practically no other jazz guitar teacher can give you…
How am I so confident to do that?
It’s simple.
a) My jazz guitar learning process (above) is infinitely better than any other process of learning jazz on the guitar
b) The system through which I work with students, hold them accountable, and get them feedback is infinitely better than any other teaching method.
This is the “new-way of learning jazz”, and it’s infinitely better than the “old way”.
Let me explain.
How it works:
Tracking
The old way of learning jazz guitar is not tracking your practice at all OR tracking either too little / too much stuff or information that is not actionable.
The problem with that is there’s no planning and no consistent tracking of progress on the plan!
In other words: how do we know when we’ll get there? No roadmap. No plan, no map, no GPS … no fun.
SOLUTION: Daily Practice Pulse System!
Finally: what to practice, and how to practice becomes immediately obvious.
Instead of just having a notebook as a “practice diary” with over-planning or no planning at all …
Now you use a cohesive system with a foolproof plan, all the while tracking every minute of the time you invest in practice.
And that’s how you’re able to see the ROI (return on investment) immediately the first few weeks.
To help us track your progress even further, we have a coach check-in form.
With the coach check-in form, we achieve
Tangible progress tracking, with a definite amount
Getting you “back on the saddle” if you feel you are not on track
Answering any questions about the use of any/all tools in the program.
Clarity on your next steps for maximum progress
Coach Check-In DEMO: Click here for the demo
Feedback
The old way of getting feedback from a teacher is live.
You meet for a lesson, you play, and the teacher gives you feedback.
You adjust how you play in real time. And the instructor gives you “things to work on” and “pointers”. Hopefully you will have worked on that before the next session.
Problems:
- Not enough time to digest and implement the feedback.
- You forget elements the teacher told you to improve.
- You HAVE to wait for another week until you get feedback again because usually lessons are weekly.
- Teachers are not incentivized to increase your skills because they are paid PER HOUR for the 1:1 session (and not paid on results)
- During a session, the instructor may …
a.) Not let you play enough
b.) Make you feel nervous or anxious
c.) Forget to review previous assignments
Trust me, I’ve heard this countless times from students: “Yeah yeah, I finished working on this piece/exercise”. My answer “Ok, play it”
You’d be surprised: most of the time, the assignment isn’t “done” at all.
So I never “take your word for it” anymore. (Sorry guys 🤷🏻♂️)
SOLUTION: Video Submissions!
Play the thing, record yourself doing it (it’s super easy, you just need your phone), submit the video, and show me that what you were assigned is actually now playable for you.
Let’s see if you’re ready to move on, and have extracted all the juice from the tune or exercise.
In the Jazz Guitar Accelerator, you submit unlimited videos of your playing, and get CUSTOM VIDEO or WRITTEN FEEDBACK on every single submission!
Ensuring that you:
- Have enough time to REALLY digest and implement feedback you’re getting. You can always rewatch/reread the feedback unlimited times.
- NEVER forget what to improve, because you can ALWAYS remind yourself.
- You do NOT wait a week to get feedback. You can possibly get DAILY feedback, meaning you have tighter and faster feedback loops, ensuring fast progress. (i.e. If you get feedback every day, you will effectively 5x the speed at which you improve)
- And of course, because of the guarantee in the agreement, I’m ACTUALLY incentivized to get you the best results possible, because if I do not fulfill on my promise, I will work FOR FREE (See how it’s different than your ordinary guitar teacher running down the clock, waiting for an hour to pass?)
- And, no shame in admitting this: you can do as many “takes” as you want with your phone camera, for each submission! 😅
Can you see how the “new way” is much better than the old way?-
Now other than video feedback, you WILL have 1:1 calls with me once per month. BUT we typically do not play. I call those “momentum calls”, and it’s just to ENSURE that you’re on the right track, to review your progress so far, and to solve any problems as they come up.
In summary, momentum calls are used to fine-tune your practice plan, or to create a fresh one. Plus, I record and upload every 1:1 with all students, and keep our meetings safe, archived for one year.
We also offer 24/7 chat support with Marc to ensure you never get lost in a big program like this and never have any of your questions unanswered.
With a 24-hour turnaround time (on business days).
Also, you have access to mentors who have completed the program before you and are willing to lend a helping hand, anytime.
Community/Accountability/Networking/Fun
The old way of learning jazz guitar is alone.
The problem with that is guitarists feel isolated, are not sure if they’re improving or even if they’re working on the right things.
SOLUTION: Community of people on the same journey as you!
Instead of self-doubt, isolation and often getting caught in a negative spiral …
Now you can share your thoughts and ask questions to peers who are (or were) on the exact same journey as you.
And that’s how you’re able to improve faster, get over plateaus in record time, and finally feel good about learning and practicing jazz guitar. Genuine exchanges with other guitarists that really understand what you’re going through…
Think about it, you’re leveraging MY EFFORT of 15 years building an online presence and congregating committed jazz guitarists in the same place.
How amazing is that?
Inside of the community, there are also 2 group calls PER WEEK, with me personally, and other members.
The biggest value out of these group calls is:
- Answering any question IN DEPTH, and discussing common obstacles
- Hanging out, meeting cool people, and networking (talking about gear, etc.)
- You can ask for a “demo”, and I’ll play the stuff you're working on, to the best of my ability and preparation.
These meetings are NOT that important, but they are a great bonus.
If you cannot attend them, it doesn’t matter too much.
The recommended amount is 3 attendances per month. Alternatively, you can comment on a call replay as “proof” of your attendance. But this is not middle school anymore …
I say this because everyone’s schedule (and timezone) is different.
You can ask questions that you want to be addressed upfront, I will respond to them during the call, and you can rewatch the Q&A recordings later.
Calls are documented with tags, topics and timestamps. So it’s really easy to get back to the recording and find the topic of your interest. You can even search archives (past 3 years) of Q&A and other calls.
Resources & Course Content
The old way of learning jazz guitar is buying courses and other “information” and trying to implement everything on your own without any outside feedback.
The problem with that is that you will eventually hit a roadblock because this “information product” is NOT created based on YOUR specific circumstances.
Everyone’s situation is unique and different and there are things that you just cannot learn that way.
Also, the big problem is that you’re not ACTUALLY getting feedback which is absolutely REQUIRED to get better.
Why do we need feedback?
Even Olympic athletes re-watch the videos of their performances to improve.
Music schools (e.g. Julliard) hold recitals for their students, and performances get savagely critiqued. You get the idea.
So there are a lot of other problems with learning jazz “with just an encyclopedia of useful information”, but another big obstacle is no accountability.
We’re humans. Life happens.
We don’t do the work. We procrastinate.
Even if we want the end result really bad.
We need to have someone actually holding us accountable for stuff that is really important to us.
If we really want to see the results.
Also, you cannot just be randomly consuming content without a certain order or sequence.
You will just experience information overload, you will get confused, and overwhelmed, and you will quit or just be really sad because you are not able to improve.
SOLUTION: “Drip Feed” Course & Resources (alongside everything else)
Instead of you getting overwhelmed and not being able to get THE RIGHT resources for THE SPECIFIC PROBLEM that you’re experiencing IN THE SPECIFIC SITUATION…
I will drip feed you course content and tell you (and give you) EXACTLY what to consume AND in what sequence.
That way you will be able to improve much faster, you will not get overwhelmed, and you will be super motivated because you’re watching and learning the RIGHT THINGS at the RIGHT TIME.
(and you know it…)
As you can see…
Jazz Guitar Accelerator is SO MUCH better than EVERYTHING ELSE that is out there “claiming” to improve your jazz guitar skills.
It’s not a course. It’s not a traditional 1:1 lesson. And it certainly isn’t a useless membership.
It’s a perfect combination of information and feedback WITH A REAL TEACHER…
And it will ultimately make jazz guitar chops second nature to you…
AND 4x your jazz guitar skills in 12 months GUARANTEED.
When you join, you get access to a coach, accountability, practice tools, all the videos and PDFs (all songs and exercises) …and actual real live feedback on your video assignment submissions on an ongoing basis.
And you will thus ensure that -1- your progress is real, measurable, and quick (right off the bat) and -2- you master all the subtle tools that allow you to continue improving your game for years to come, and -3- you never get stuck in a rut ever again.
With frequent feedback on your playing, we can “nip in the bud” any bad habits or nuisance for your playing, early on.
The program is actually based mostly on the students receiving direct, honest, objective, and complete feedback with guidance on the next steps.
We are using a platform with a one-click login (plus Zoom calls) to get this going. So it’s really simple on the technological front (not another Facebook group, I promise!)
I will explain all the finer details on the onboarding call with you, and I will personally spend a 30min in 1on1 to make sure you have everything you need to get started and master early elements of this process (Staples Voicings, Conveyor Belt, Chord Melody, etc.) as soon as possible.
All you need really is a device connected to the internet and your guitar.
Bring your A-game, a smile, something to take notes … and some grit and perseverance, because things are about to get real! :)
I have very limited spots because of the 1:1 attention so watch the video on this page below and book a call to claim your spot:
https://www.jazzguitarlessons.net/video
This is ONLY for you if:
- You are a guitarist & lifelong lover of music looking to crack the jazz code
- You have 5-12 hours per week to dedicate to learning and practicing
- You are willing to invest in yourself
Case Studies & Results:
Name: Alfred Yanone
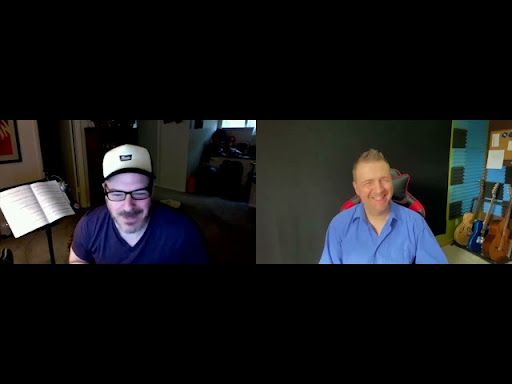
Before: Proficient heavy rock and blues guitarist. Memorizing with “TABS and frets”. Shaky sense of time (“haven’t played a rest in 30 years”)
After: Demystified fretboard: Scales and modes just “light up” on the fingerboard Strong sense of timing and solid rhythms
Timeframe: 90 days
Quote: “I hadn’t played a rest in 30 years!”
Full Interview: https://youtu.be/tyfmR4aPIQ4
------------------------------------------------------
Name: Brad Romans
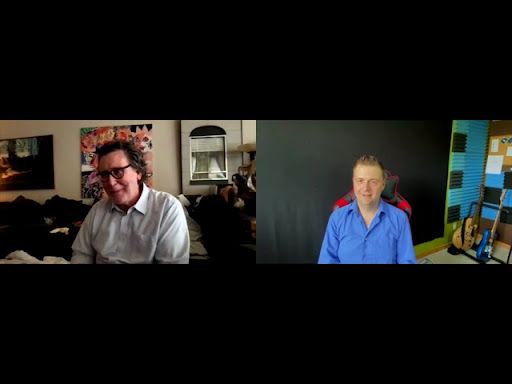
Before: Self-taught blues improviser. Unfocused. tried to teach himself jazz with YouTube.
No significant progress.
After: Ready to “sit in” at a local jazz jam. Confident improv on jazz chords, “making the changes”. Bebop tunes. Structure and focus in practice. Commitment and trust in the process.
Having fun!
Timeframe: 12+ Months (ongoing coaching with Marc)
Quote: “You can now hear the chord changes in my improvisations!”
Full interview: https://youtu.be/-Q4P2fwAAAU
------------------------------------------------------
Name: Steve Visio
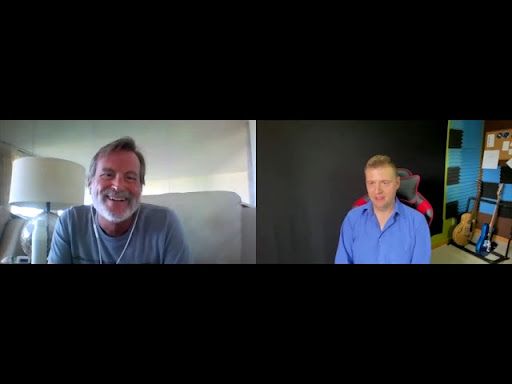
Before: No structure, no habits for improving jazz skills. Solos are all pentatonics. Can’t play the phrases I hear in my head on the guitar. Musical self-esteem is a rollercoaster.
After: Confidence! Understanding the process. More relaxed (neurotic), enjoying playing the music and keeping the growth going!
Timeframe: 10 months
Quote: “My guitar skills are on a steady upward slope; I’m more deliberate now and my choices and inputs will affect my outcomes”.
Interview: https://youtu.be/5d69DlmOgAM
I don’t want to make this waaay too long so click on the link below to see all the results.
All results: https://www.jazzguitarlessons.net/reviews
Go here to be my next success story: https://www.jazzguitarlessons.net/video
The price tag?
It is expensive, but as I said, it will completely transform your guitar playing.
Schools like Berklee cost nearly 50k
And you'd have to spend 18k on private lessons over 5 years to get a similar outcome that you can get by working with me for a fraction of that cost.
Watch the video on this page to get the price:
https://www.jazzguitarlessons.net/video
Q & A:
I need to talk with my wife/husband before making a decision
- Of course, you need to talk with your partner.
- I recommend that you do that before scheduling an interview with me.
- If your partner is supportive of your dreams, it shouldn’t be a problem.
- It’s not cheap. But it’s an absolute steal considering how MUCH value you’re going to get in proportion to your money transforming your playing and changing your life for the better.
What if your program doesn’t work?
- The only way it doesn’t work is if you don’t actually do what I say and follow the system.
- It worked for me, and for hundreds of other students, this is all I do.
- I only “allow” people in the program if I’m 110% confident I can help. No BS.
- If you don’t 4X your skills in the first year, I work for free with you until you don’t. I don’t want to work for free, do I?
I don’t think this is for me right now.
- The faster you start implementing the proven system with the right support, the faster you will improve.
- If you’re okay with sitting in one place for years and not making progress, cool.
- It also depends on how MUCH this means to you. If it doesn’t mean that much at all, I don’t even recommend you join us.
This is a busy season for me, maybe this is not the right time. What time commitment is needed?
- I completely understand. I’m a full-time guitar teacher. Filming YouTube videos, writing articles, and co-parenting at the same time… I know the feeling
- But there’s something that I would like to ask you…
- Do you want this to be something that lasts for the long term?
- If the answer is yes, and this really means a lot to you, I would say that if you learn to find time and do it when you’re busy, you’ll do it forever, guaranteed.
- My most successful students practice on average 70 minutes a day. That is a sweet spot. Everything above that can be “bad” for your progress (burnout).
- I would say that you can get away and make amazing progress with 30-45 minutes a day
- If you’re able to commit to this, awesome.
- If not, do not apply, you won’t be approved.
I have something coming up in the next weeks/months, and I wouldn’t like to start it and can’t fully commit. How do I go around this?
- Completely understand. I worked with 100s of students and there’s always something that comes up
- If this really means a lot to you, then, we will figure something out.
- The worst-case scenario is I just pause the duration of your program for the time you’re off and then resume it when you’re back.
- I highly suggest that you book a call.
I need to think about it.
- Got it.
- Just curious… Think about what?
- All that you need to know is here. And I’m the only other source of information.
- Let’s figure it out together. It’s easier. No one is going to pressure you into doing anything. But if this really means a lot to you, do yourself a favor, and do not delay the decision. Either 4x your jazz guitar skills and enjoy more, or do not. Your choice.
- (+ I can easily run out of spots)
What if I’m currently taking lessons with someone else?
- This is great! A local teacher can be another source of feedback once you have a solid process in mind for learning jazz
- Most students in Jazz Guitar Accelerator rely on their current instructor as an additional resource for wisdom and touch points once in a while.
- In all honesty, from my experience, other lessons will not be required once you dedicate 100% of your focus to my program …
I have another question…
- Message me @ [email protected]
- Or book a call if you would like to sign up before I run out of seats: https://www.jazzguitarlessons.net/schedule
So if you’re tired of:
- Poor practicing habits
- Procrastination on the plan
- Not improvising & comping well
- Following gurus on YouTube without success
- Purchasing gear, transcriptions, scores, sheet music
- Books, courses, and memberships that don’t work
- Not being able to play well at a jam session and being intimidated by someone asking “Hey play me a song”
- And most importantly, not having consistent progress and growth in proportion to the time that you put in…